


Setup SNMP Agent Community
Overview
This function sets up the SNMP Agent Community.
The Community is a range of available networks for SNMP.
The setting value is used as the password for SNMP Manager to access the SNMP Agent of the storage system.
The SNMP Agent only accepts a request from SNMP Manager if the specified community names for SNMP Manager and SNMP Agent are the same.
Up to ten communities can be specified for each storage system.
If the "SNMP Function" is disabled, this function cannot be used.
The community name that is used in the [Setup SNMP Agent Trap] cannot be changed or deleted.
This function must be used when using SNMPv1 or SNMPv2c in SNMP communication between the SNMP Agent and the SNMP Manager. This setting is not necessary when using SNMPv3 only.
The SNMP Managers which are allowed to access, and the MIB access range, can be specified for each community.
User Privileges
Availability of Executions in the Default Role
| Default role | Availability of executions |
|---|---|
| Monitor | |
| Admin | |
| StorageAdmin | |
| AccountAdmin | |
| SecurityAdmin | |
| Maintainer |
Refer to "User Roles and Policies" for details on the policies and roles.
Display Contents
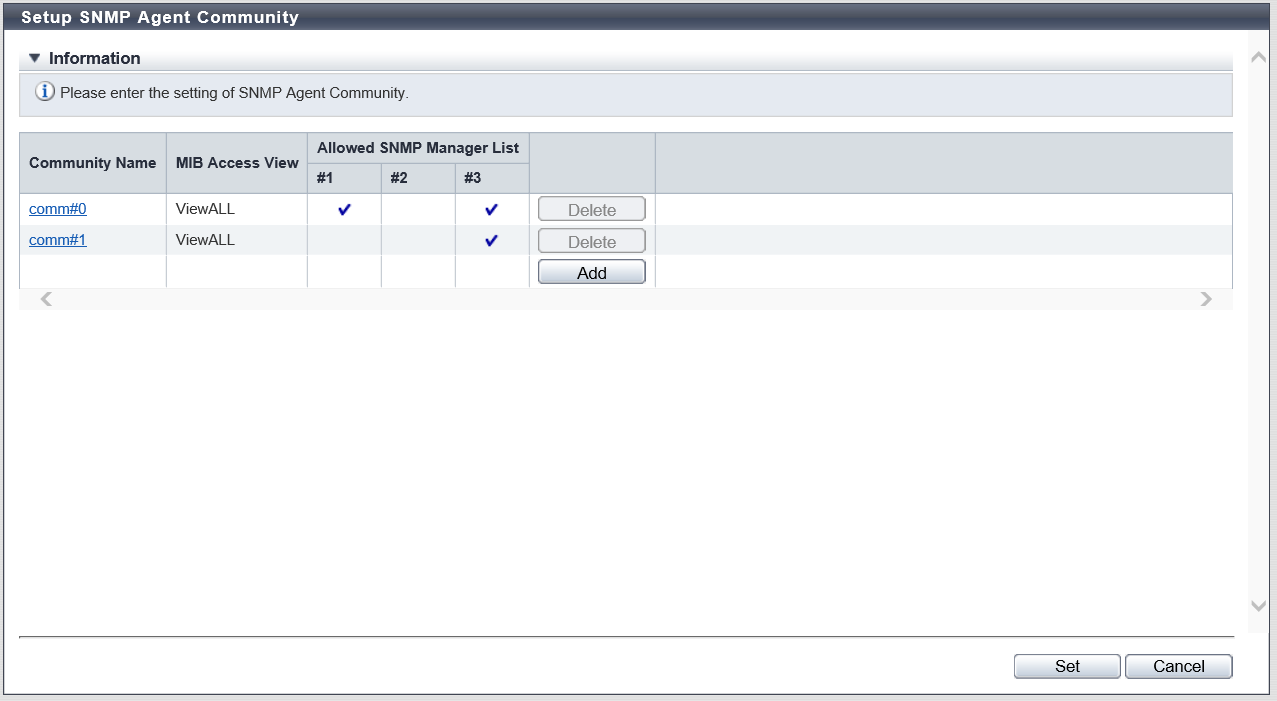
In this screen, the registered communities in the storage system are displayed.
Click the [Add] button to display the [Setup SNMP Agent Community] Screen. Specify the community settings in the [Setup SNMP Agent Community] Screen.
| Item | Description | |||
|---|---|---|---|---|
Community Name |
The community name is displayed. Click the [Community Name] link to display the [Setup SNMP Agent Community] Screen. The community information can be edited in the [Setup SNMP Agent Community] screen. |
|||
MIB Access View |
The view name to indicate the MIB access range for each community is displayed. A "blank" means accessing the MIB is not allowed. |
|||
Allowed SNMP Manager List |
The management number of the SNMP Manager, "#x" (x: 1 - 10) which has been registered using the [Setup SNMP Manager] function, is displayed. Only the selected SNMP Manager is allowed to access. However, if the Allowed SNMP Agent Manager List has been left blank, all of the SNMP Managers (*1) are allowed to access.
|
Settings
[Setup SNMP Agent Community] Screen
In this screen, register or edit a community.
| Item | Description | Setting values | |||
|---|---|---|---|---|---|
Community Name |
Input the community name to be used when accessing a MIB or sending a trap. The community name which has already been used cannot be entered. Caution
|
Up to 32 alphanumeric characters, symbols ("!", "#", "&", "_", "+", "-", "*", "/"), and spaces |
|||
View Name |
Select the view name to specify the MIB access range for the community. A "blank" means accessing the MIB is not allowed. Note
|
ViewALL View-mib2 View-exmib The view name that is registered with the [Setup SNMP Agent MIB Access View] function Blank |
|||
Allowed SNMP Manager List |
Select the IP address of the SNMP Manager which is allowed to access in the community. Only the selected SNMP Manager is allowed to access. However, if the Allowed SNMP Agent Manager List has been left blank, all of the SNMP Managers (*1) are allowed to access.
|
Checkbox Selected: Allowed Cleared: Not allowed |
Function Button
| Button | Description |
|---|---|
[Add] |
Adds a community. If the maximum number of communities have been registered, the [Add] button is not displayed. |
[Delete] |
Deletes a community. The [Delete] button cannot be clicked in the following conditions:
|
Operating Procedures
Click [Setup SNMP Community] in [Action].
When adding a community, click the [Add] button.
Click the [Community Name] link to edit the community.
→ The [Setup SNMP Agent Community] screen appears.
NoteTo delete the existing community, click the [Delete] button for the target community.
Add or edit the community, and click the [OK] button.
→ Returns to the original screen.
Repeat Step 2 and Step 3 to configure multiple communities.
After adding or editing the community, click the [Set] button.
→ A confirmation screen appears.
Click the [OK] button.
→ The SNMP Agent Community setting starts.
Click the [Done] button to return to the [Network] screen.