


Setup SNMP Agent MIB Access View
Overview
This function sets up the SNMP Agent MIB View.
MIB View is used for defining the accessible area in the Management Information Base (MIB) database, with a tree type structure. Use this item when defining the accessible area in the MIB database.
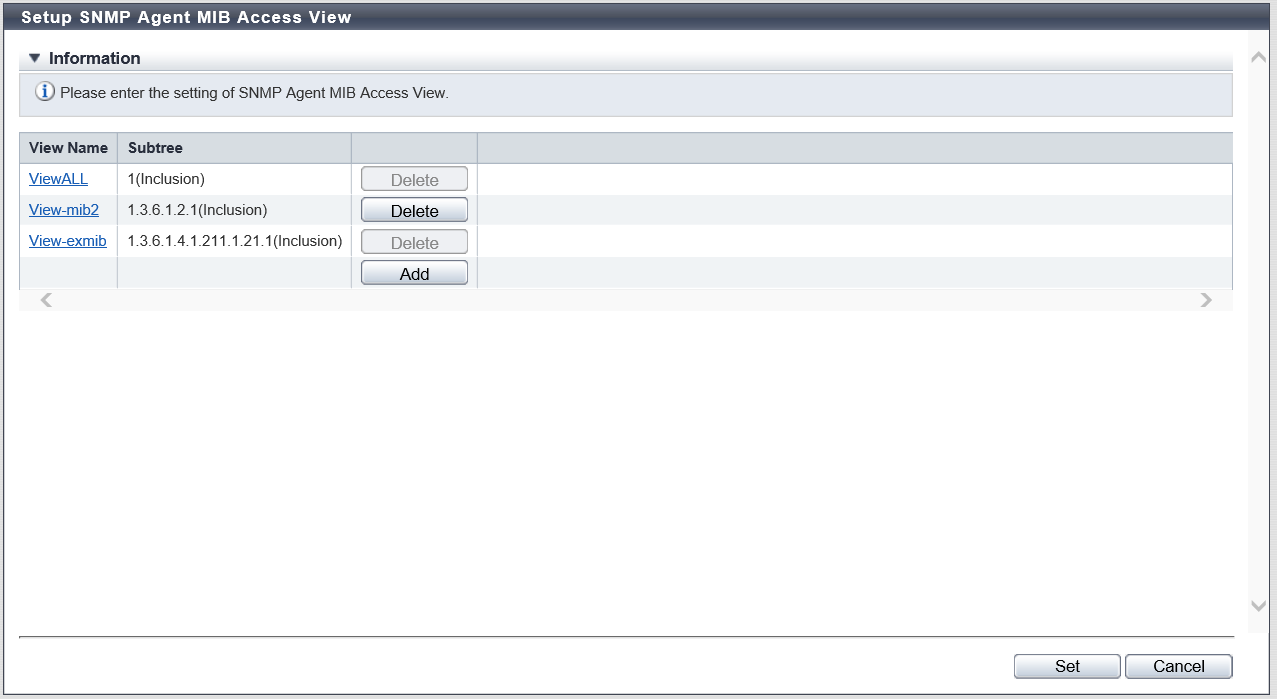
Up to ten MIB Views, including the default view, can be created for each storage system. There are three types of default views: "ViewALL", "View-mib2", and "View-exmib". The default view can be changed or deleted.
If the "SNMP Function" is disabled, this function cannot be used.
The view name that is used in the settings in the [Setup SNMP Agent User] function or the [Setup SNMP Agent Community] function cannot be changed or deleted. However, note that the MIB View (Subtree) can be changed.
User Privileges
Availability of Executions in the Default Role
| Default role | Availability of executions |
|---|---|
| Monitor | |
| Admin | |
| StorageAdmin | |
| AccountAdmin | |
| SecurityAdmin | |
| Maintainer |
Refer to "User Roles and Policies" for details on the policies and roles.
Display Contents
The registered MIB Views in the storage system are displayed.
Click the [Add] button to display the [MIB Access View] Screen. Configure the view name and the subtree in the [MIB Access View] Screen.
| Item | Description |
|---|---|
View Name |
The MIB View name (*1) is displayed. Click the [View] link to display the [MIB Access View] Screen. The MIB View can be edited in the [MIB Access View] screen. |
Subtree |
The subtree is displayed in the Object ID format. This item displays whether the Subtree1 - Subtree10, which have been specified in the MIB View, are included as, or excluded from, the MIB access range. |
| *1 | : | The default view and the newly registered MIB View(s) are displayed. The following table shows default views:
|
Settings
[MIB Access View] Screen
In this screen, register or edit the MIB View.
| Item | Description | Setting values |
|---|---|---|
View Name |
Input the MIB View name. The view name which has already been used cannot be entered. Caution
|
Up to 32 alphanumeric characters, symbols ("!", "#", "&", "_", "+", "-", "*", "/"), and spaces |
Subtree1 - Subtree10 |
Specify the MIB access range of the corresponding view in the subtree. Input the subtree in the Object ID format (*1). Select whether to include as or exclude from each subtree as the MIB access range. One or more subtrees are required per view. The same subtree cannot be specified multiple times in a single view. However, the same subtree can be configured to different views. |
Alphabetic characters, numeric characters (1 - 65535), and symbols Spaces 1 - 251 characters Inclusion Exclude |
| *1 | : | The "Object ID" is indicated by using "." (periods) in a format such as "1.3.6.1.2.1.1". The setting range of each value that is separated using "." (periods) is 1 - 65535. A total of up to 251 characters can be entered (including periods). The following values cannot be entered in the storage system: (1) Values starting with a period: ".1.3.6.1.2.1.1" (2) Value ending with a period: "1.3. 6.1.2.1.1." (3) Values with two consecutive periods: "1. . 3. 6. 1. 2. 1. 1" (4) Values including "0": "1.3.6.1.2.0.1" |
Function Button
| Button | Description |
|---|---|
[Add] |
Adds the MIB View. If the maximum number of MIB Views have been registered, the [Add] button cannot be clicked. |
[Delete] |
Deletes the MIB View. The [Delete] button cannot be clicked in the following conditions:
|
Operating Procedures
Click [Setup SNMP MIB View] in [Action].
When adding an MIB View, click the [Add] button.
Click the [View Name] link to edit the MIB View.
→ The [MIB Access View] screen appears.
NoteTo delete the existing MIB View, click the [Delete] button for the target MIB View.
Add or edit the MIB View, and click the [OK] button.
→ Returns to the original screen.
Repeat Step 2 and Step 3 to configure multiple MIB Views.
After adding or editing the MIB View, click the [Set] button.
→ A confirmation screen appears.
Click the [OK] button.
→ Setting of the SNMP Agent MIB Access View starts.
Click the [Done] button to return to the [Network] screen.