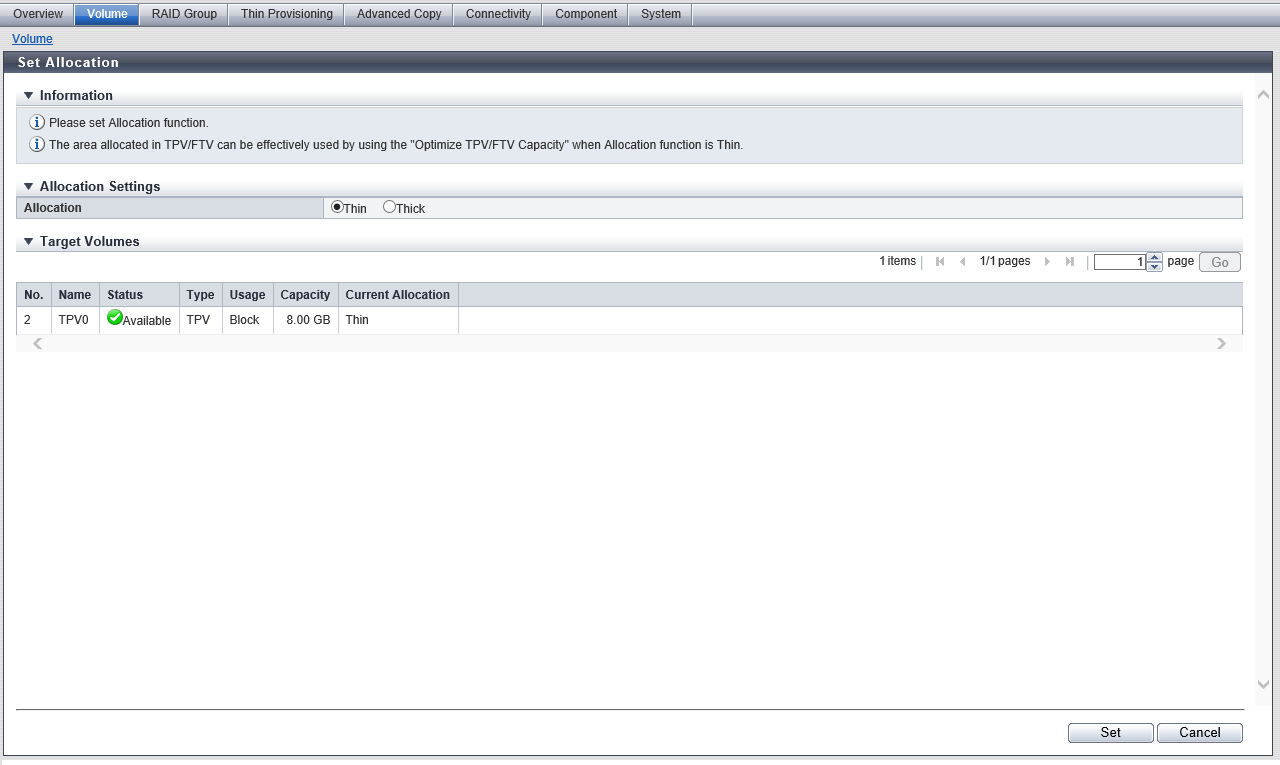
Set Allocation
Overview
This function changes the allocation method for the existing Thin Provisioning Volumes (TPVs) and Flexible Tier Volumes (FTVs).
There are two allocation modes. The default value is "Thin".
Thin
Physical area is allocated to the target area of the volume when a write I/O is received.
This method virtualizes and allocates the storage capacity to reduce the physical capacity of the storage.
Thick
Physical area is allocated to the whole area of the volume when volumes are created.
This method is used for volumes such as those allocated for the system area to prevent system halts due to pool exhaustion during operations.
This function is available for "TPV" or "FTV" type volumes. Note that this function cannot be used for "TPV" type volumes that are used as Deduplication/Compression Volumes or Data Container Volumes.
If the allocation method is changed from "Thick" to "Thin", optimize the capacity. If a capacity optimization is not performed, the used capacity (the physical capacity that is allocated to volumes in the entire TPP) is not reduced. Refer to the [Optimize TPV/FTV Capacity] function for details.
This function cannot be used if the allocation method is changed from "Thin" to "Thick" when the free space in the TPP or FTRP has been insufficient.
This function cannot be used when the capacity releasing from the server is being performed.
- This function cannot be used if one of the following conditions is true for the selected volume:
A capacity optimization is being performed or a capacity optimization is being reserved when the allocation method is changed to "Thick"
RAID migration is being performed
TPV balancing is being performed
FTRP balancing is being performed
The selected volume belongs to a TPP with a "Broken" state
The selected volume belongs to an FTRP with a "Broken" state
The selected volume is a work volume that is created during a RAID migration
The volume allocation method can be selected when creating a "TPV" or a "NAS Volume". The default value is "Thin". Refer to the [Create Volume] function for details.
For "TPV" type ODX Buffer volumes, the volume allocation method can be selected during volume creation. Refer to the [Create ODX Buffer Volume] function for details.
For "FTV" type volumes and for "FTV" type ODX Buffer volumes, the volume allocation method is specified during volume creation with CLI or ETERNUS SF Storage Cruiser.
The volume allocation method can also be changed when performing a RAID migration. Refer to the [Start RAID Migration] function for details.
User Privileges
Availability of Executions in the Default Role
| Default role | Availability of executions |
|---|---|
| Monitor | |
| Admin | |
| StorageAdmin | |
| AccountAdmin | |
| SecurityAdmin | |
| Maintainer |
Refer to "User Roles and Policies" for details on the policies and roles.
Settings
Allocation Settings
| Item | Description | Setting values |
|---|---|---|
Allocation |
Select the allocation method. Caution
|
Thin Thick |
Display Contents

Target Volume
| Item | Description |
|---|---|
No. |
The volume number is displayed. |
Name |
The volume name is displayed. |
Status |
The volume status is displayed. Refer to "Volume Status" for details. |
Type |
The volume type is displayed. TPV FTV |
Usage |
The usage of the volume is displayed.
|
Capacity |
The volume capacity is displayed. |
Current Allocation |
The current allocation method of the volume is displayed. Thin Thick |
Operating Procedures
Select which volume to change the allocation method for (multiple selections can be made) and click [Set Allocation] in [Action].
Caution- [Set Allocation] cannot be clicked under the following conditions:
Even if the selected volume type is "FTV", the usage is "System"
The NAS expanded system volumes are selected
The Deduplication/Compression Volumes are selected
The Data Container Volumes are selected
- [Set Allocation] cannot be clicked under the following conditions:
Select the allocation method, and click the [Set] button.
→ A confirmation screen appears.
Click the [OK] button.
→ Setting of the allocation method starts.
Click the [Done] button to return to the [Volume] screen.


